As you know, we provide a hosted instance of Bitwarden for all of our clients to use (while you are clients) free of charge. Since we utilize our own self hosted instance, the normal login procedure for Bitwarden needs a little tweaking for you to be able to login. The steps below will allow you to change where the Bitwarden app looks for the server.
- We're assuming that you have already downloaded the Bitwarden app from the App Store. If not, please do so now. Once installed, continue to step 2.
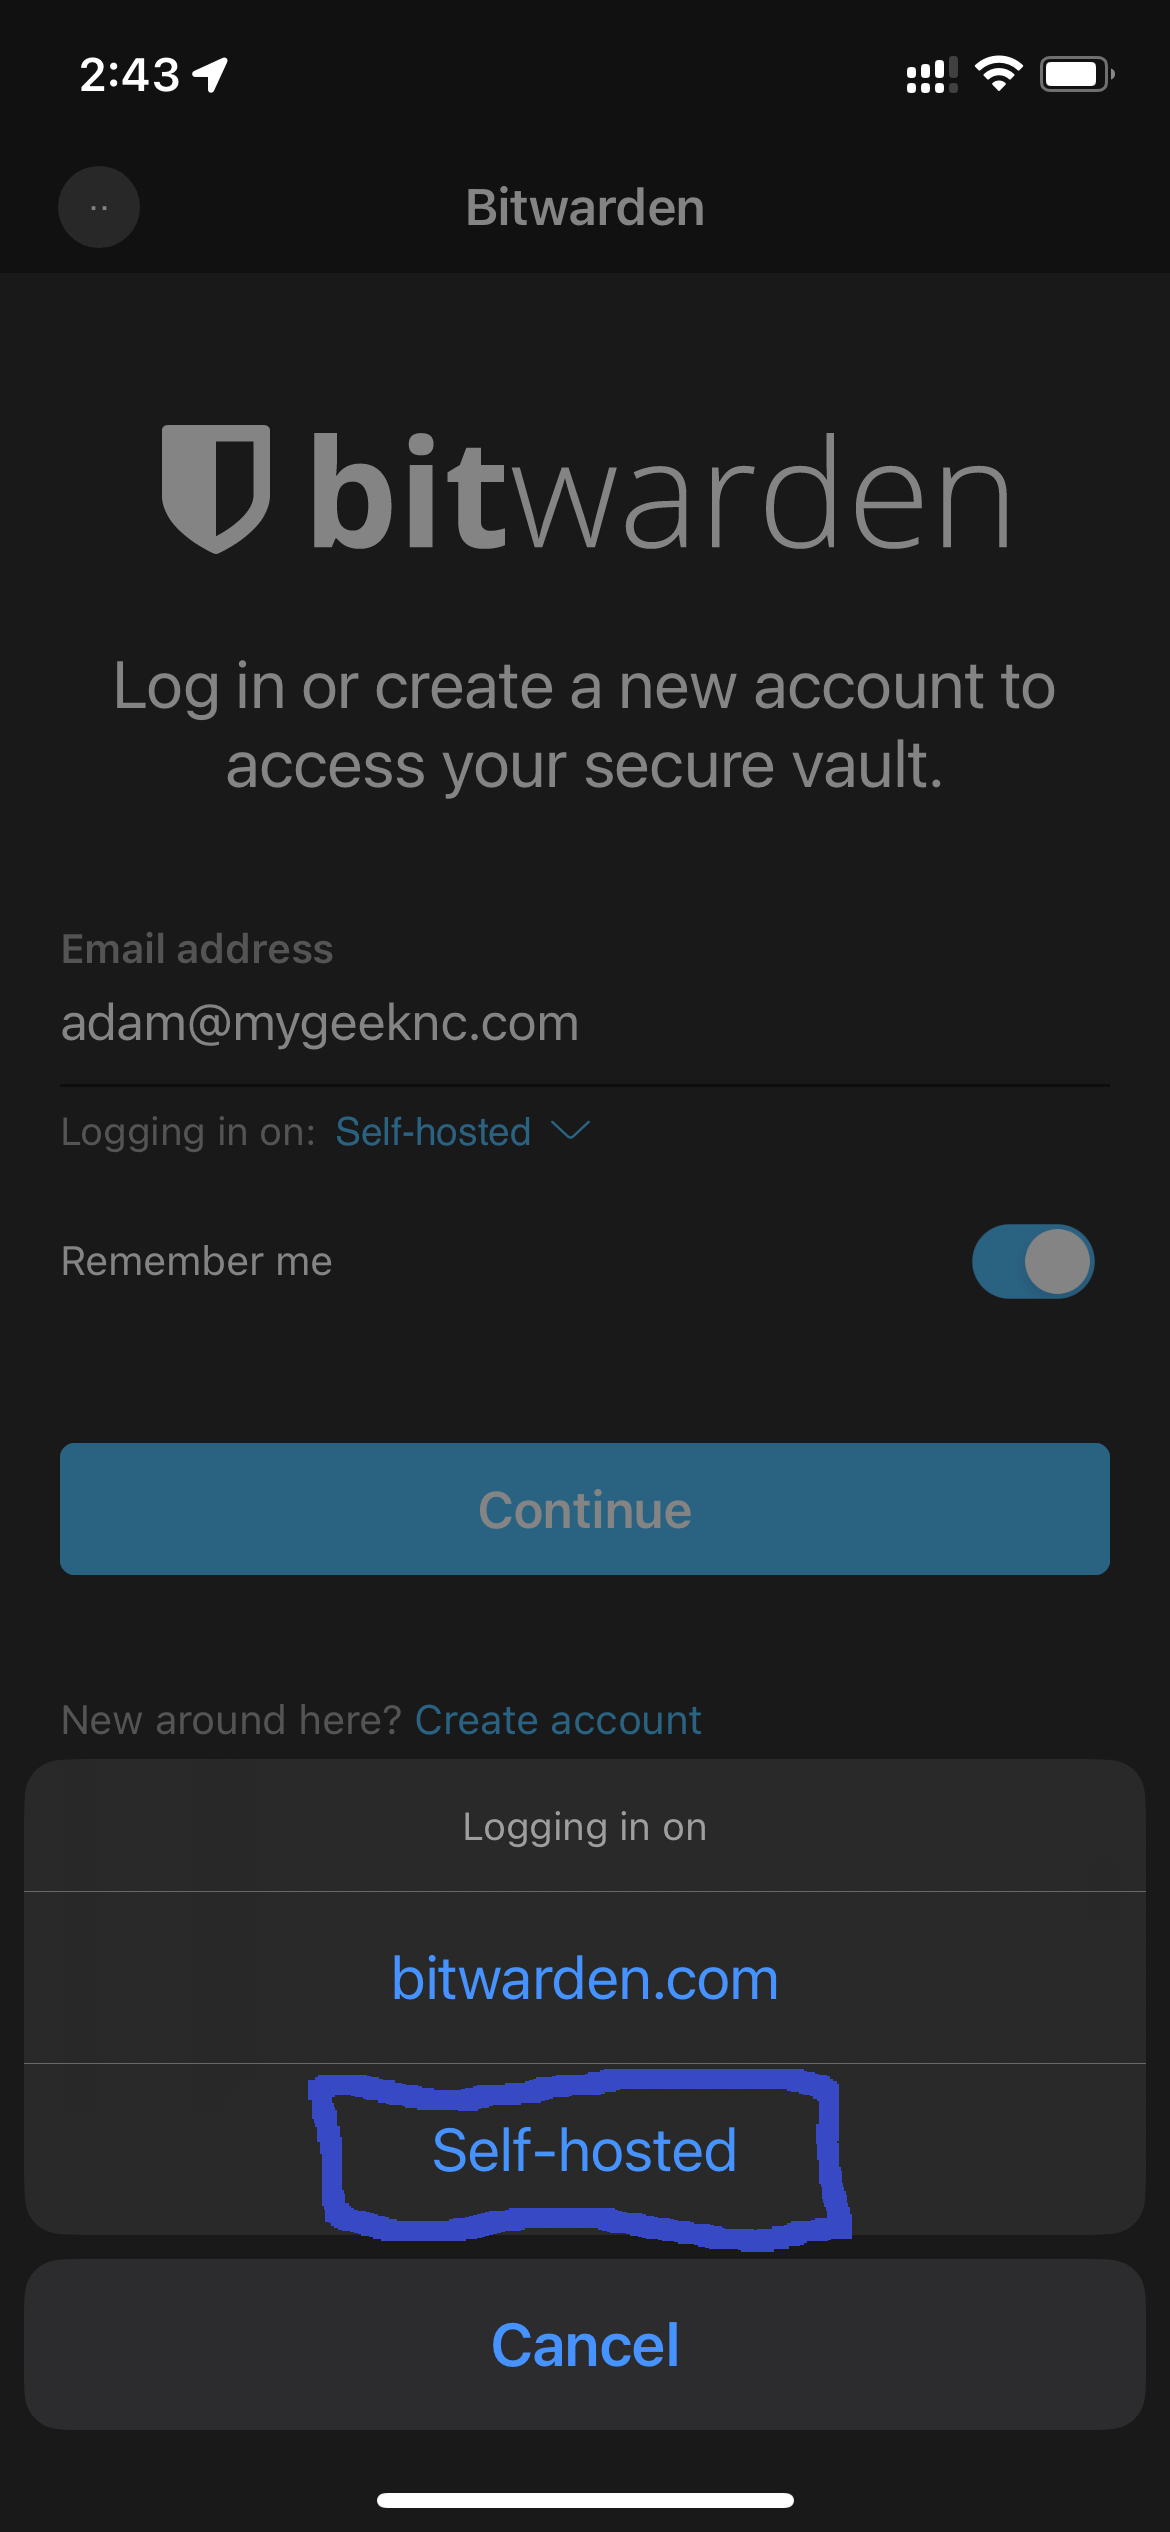
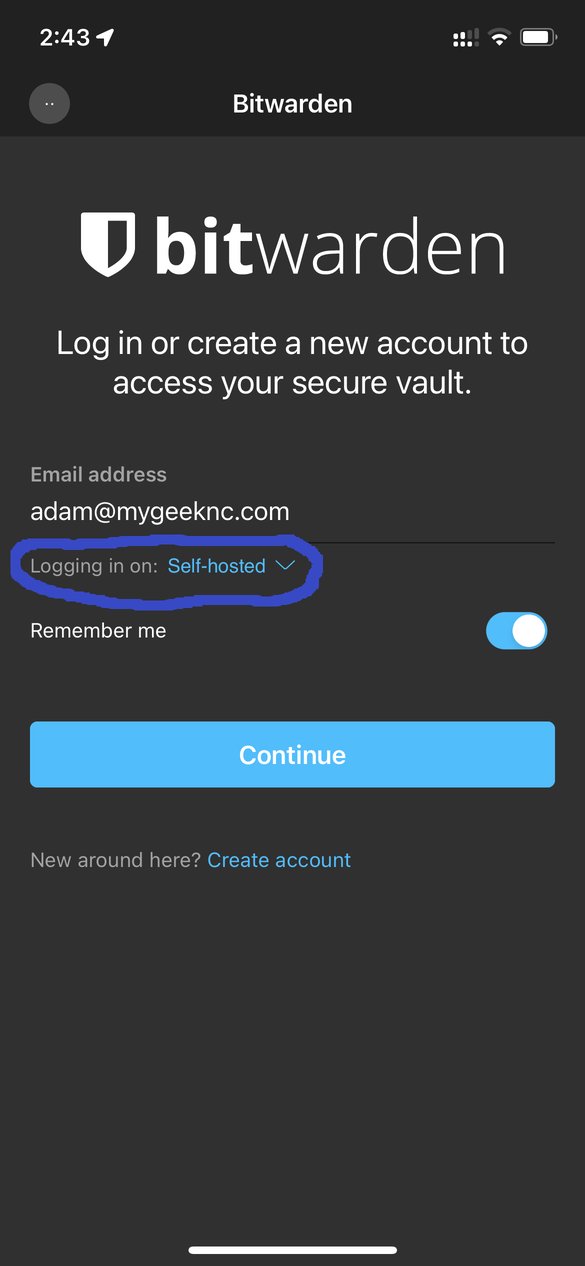
- Once you open the app, you should be at a screen to enter an email address. This is where our changes start.
- Right under the email address field there is a dropdown that says "Logging in on:" - tap on that drop down arrow.
- Next, a popup will appear at the bottom of your device where you will select "Self-Hosted" by tapping on that option.

- Right under the email address field there is a dropdown that says "Logging in on:" - tap on that drop down arrow.
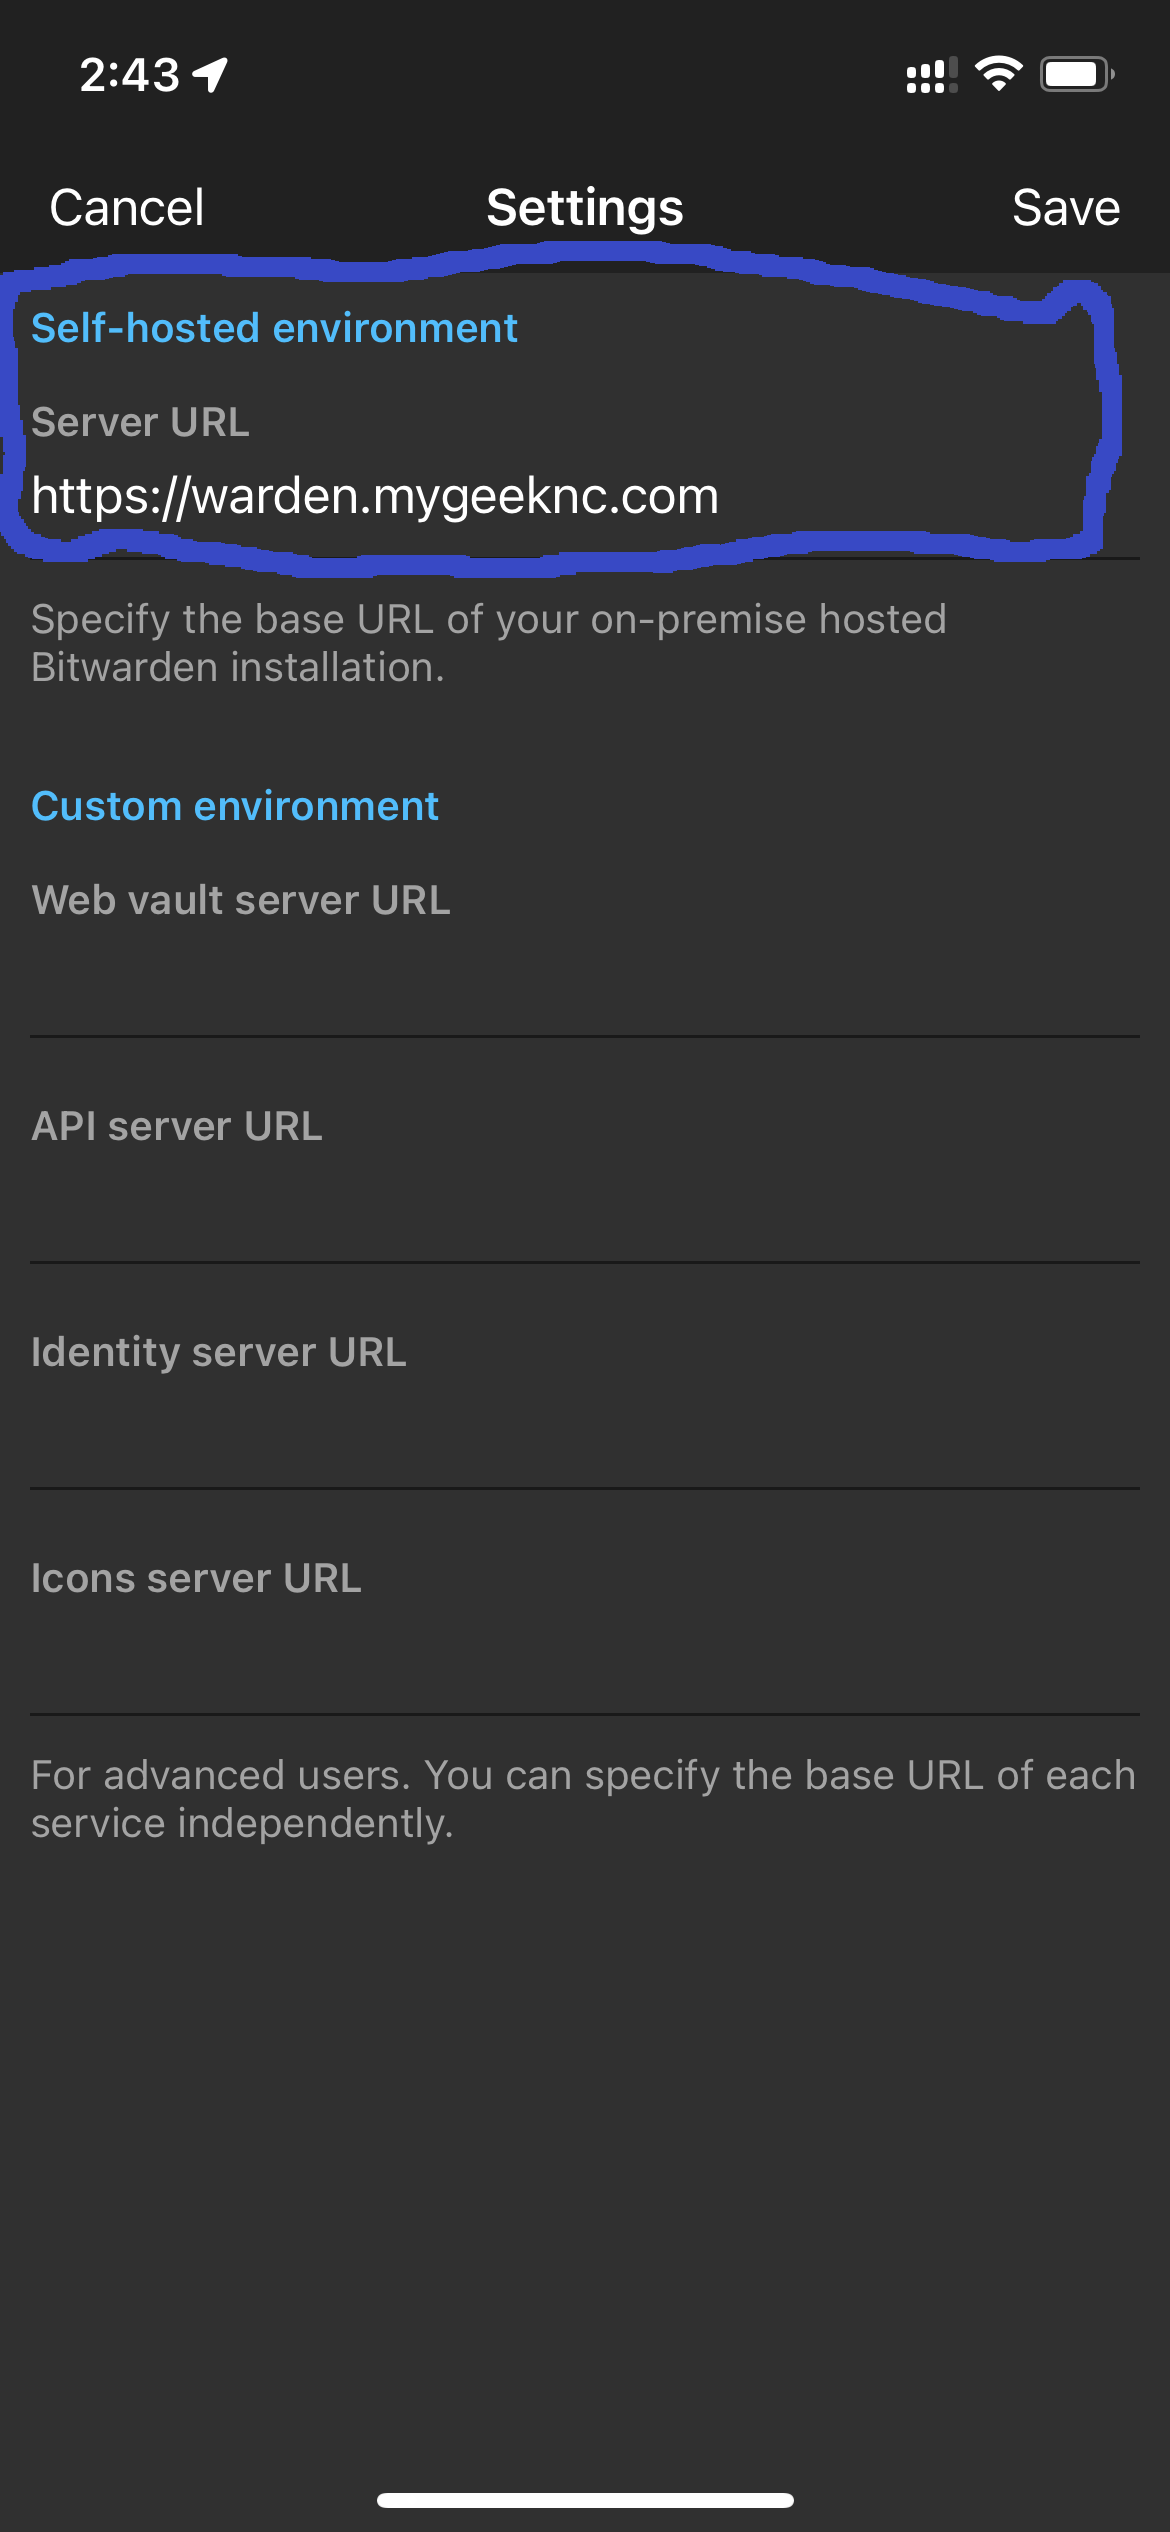
- Lastly, on the next screen you will see at the very top a text field that is labeled "Self-hosted environment". In that field, you will type in "https://warden.mygeeknc.com"
- Finally you will click save and then proceed to login. If you have any issues at all, please feel free to give us a call!